Contacts
Our storage house and office
Nemravka.cz
(areál
K
251 62 Tehovec-Vojkov
How to find us
e-mail: info@nemravka.cz
+420 734 742 604
You can do a purchase or pick up your orders.
Opening hours:
Mo - Fr 8 - 14
General information
info@nemravka.cz
Information about your orders
objednavky@nemravka.cz
+420 734 742 604
Wholesale
velkoobchod@nemravka.cz
Information about polymer clay
petra@nemravka.cz
Information about scrapbooking
scrapbooking@nemravka.cz
- Home
- Useful Links and Tips
- About (Polymer) claying
- POLYMER CLAY PATCHWORK 2016
- Arcade Game PatchWork
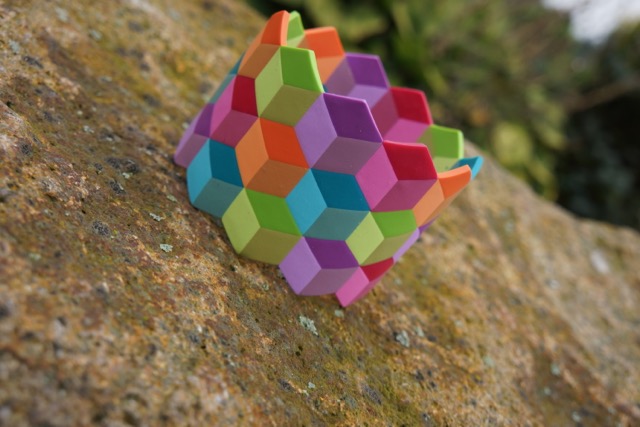
Arcade Game PatchWork
Another patchwork tutorial has come into the world. This is the last summer patchwork so its colours are cheerful again and the process is playful. The pattern is called Arcade Game and it requires a lot of blending. You need at least 5 various colours. However, choose rich colours containing a lot of pigment. Do not use blended pastel colours since this is what we are going to make now.
Are your ready? Have you got your concept? Great, let´s get started.
What do you need?
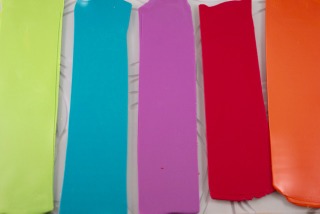
5 various colours (not white, black or dull colours – see the introduction) of polymer clay (I am using Premo) – ¼ block of each colour is enough
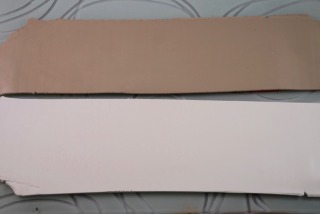
white, ecru and grey Premo clay
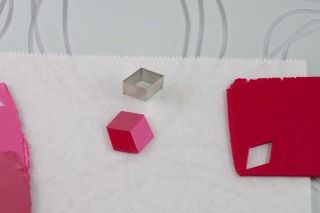
diamond-shaped clay cutter (the less, the better)
common polymer clay tools (pasta machine, …)
office paper for leaching the clay and putting the pattern together
deli paper / another type of paper for smoothing the clay
1. Condition all the clays at middle setting of your pasta machine and get elongated sheets. Do not worry if the length of the sheets is not identical, thickness is important now.
2. Condition the white clay at the middle setting as well as the colour sheets. Repeat the procedure with ecru and grey clay but mix them together first.
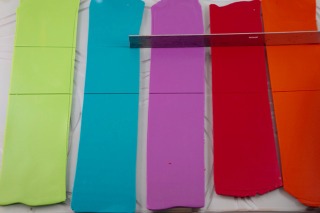
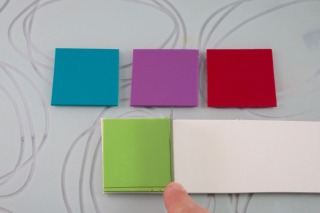
3. Cut the colour sheets into four pieces (quarters of the entire sheets). Put half of the colour sheets aside.
4. Lay one square of white clay on each colour square and blend them.
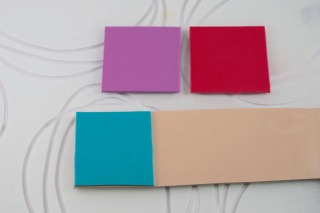
5. Lay one square of ecru and grey mixture clay on each colour square and blend them.
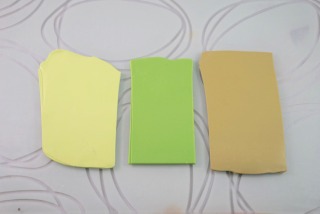
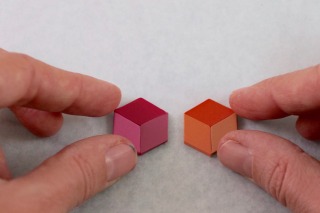
6. You get three tones of each colour: (from the left) pastel tone (by adding white colour), rich tone (the basic colour) and faded tone (by adding ecru and grey mixture).
TIP: If the clay is soft, leach the sheets between sheets of office paper for at least 30 minutes. The work with them will be easier then. After leaching do not forget to pass the clay through the pasta machine several times in order to mix the dry surface with the soft centre of the clay.
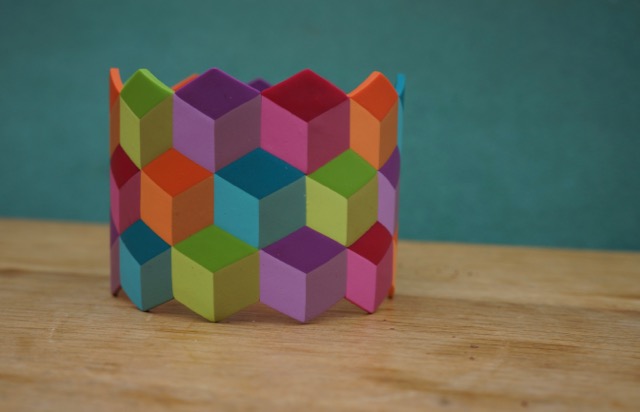
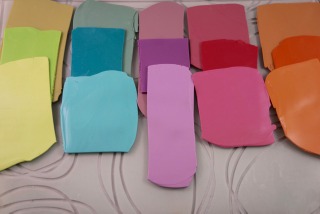
7. Now, let´s cut rhombuses out of the three new colour sheets and put them together to make hexagons as you can see in the picture. Follow the order of the tones of the individual colours. E.g. faded tone (the one with the ecru and grey mixture) is always on the right of the basic colour and the pastel tone is on the left. Thanks to this order you preserve the unity of the pieces for subsequent connection.
8. Connect the sides of the individual rhombuses and make a sheet. First, compose the entire hexagon, then attach this hexagon to the previous one. In terms of the colours, it is up to you how you arrange the hexagons.
9. Do you have a sheet composed of the individul rhomuses placed on a sheet of paper? Lay another sheet of paper over the clay and smooth out the joints. Put the paper you have used for smoothing out aside and unstick the sheet of the clay out the sheet of paper.
10. The patchwork sheet is finished. It is perfect for making jewellery with larger surface, i.e. pendants or bracelets.
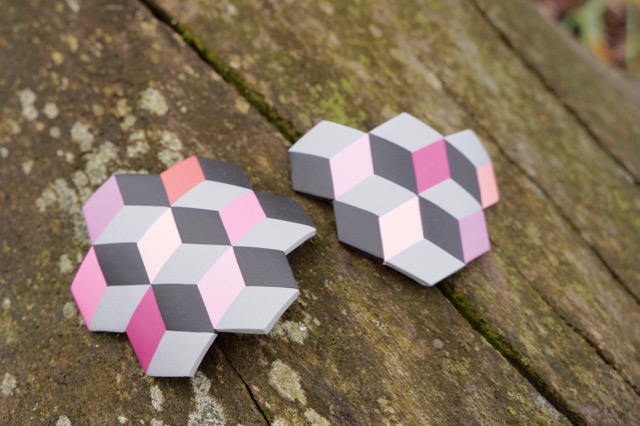
Variant of neutral black and grey and shade of pink and orange
Other tips:
Do you miss diamond-shaped cutter? Place two triangle-shaped cutters next to each other. It is more demanding but it works.
If you dont´t have any cutter, cut out the interior angles of 60° and 120° of the hexagon directly with a blade. This may be easier than using cutters for those who love cutting with a blade. Our Craftmat no. II is perfect for that.
I always cut out the clay on glass / a tile. Thanks to that the cut out piece does not stick to the base and I don´t have to remove it from the cutter with difficulties. I simply unstick it from the glass/tile using a sharp blade and the clay is ready to use and is not deformed.
Enjoy the last summer days and I´ll be back in a month with autumn colours.
Petra Nemravka