Contacts
Our storage house and office
Nemravka.cz
(areál
K
251 62 Tehovec-Vojkov
How to find us
e-mail: info@nemravka.cz
+420 734 742 604
You can do a purchase or pick up your orders.
Opening hours:
Mo - Fr 8 - 14
General information
info@nemravka.cz
Information about your orders
objednavky@nemravka.cz
+420 734 742 604
Wholesale
velkoobchod@nemravka.cz
Information about polymer clay
petra@nemravka.cz
Information about scrapbooking
scrapbooking@nemravka.cz
- Home
- Useful Links and Tips
- About (Polymer) claying
- POLYMER CLAY PATCHWORK 2016
- Tumbling Blocks Patchwork
Tumbling Blocks Patchwork
I couldn´t hardly wait for another patchwork design to present you. I am absolutely serious! If I had more time, I wouldn´t do anything else but patchworking.
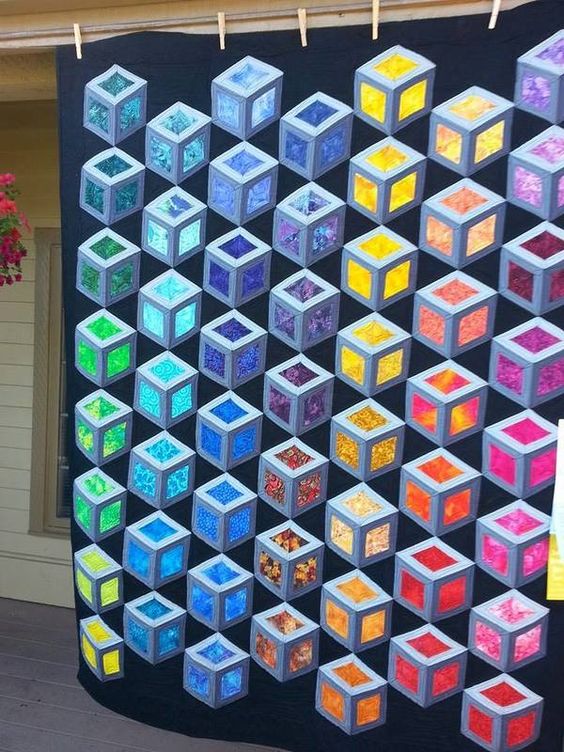
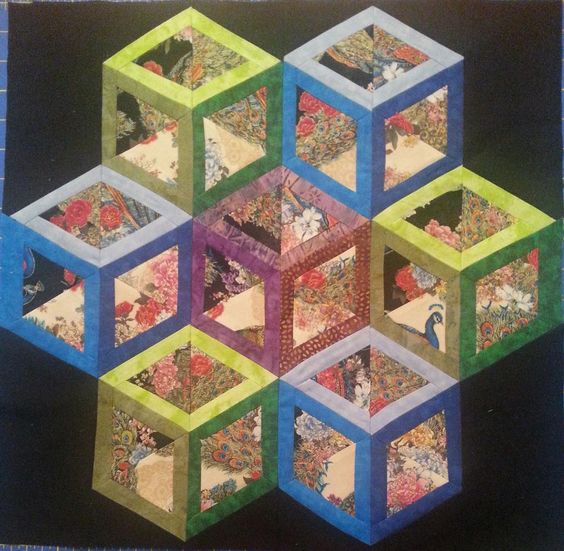
The patchwork design I chose for this month is similar to the summer Arcade Game design, however, the way the pattern is put together is absolutely different. I drew inspiration from a tumbling blocks quilt by Erika Johnson Willmore. See also a less colour variant by MamaThadeus.
You need the following:
common polymer clay tools
colour polymer clay – at least five various colours (I use Premo clay)
black and white clay
rhombus clay cutters – the smallest and the second smallest ones from the set
deli paper
smoothing tool
Procedure:
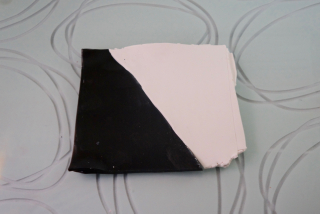
1. First, condition black and white clay and blend them. If you do not know how to blend clay, click here.
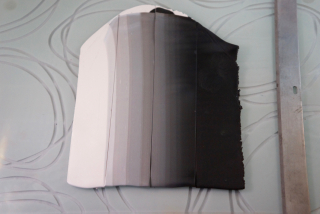
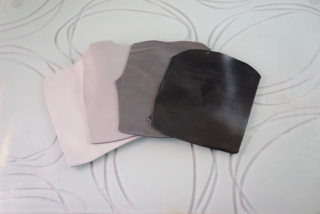
2. Cut the blend into 4 strips, each strip has a different shade of gray. Condition each single strip again on 3rd (middle) setting of your pasta machine and make 4 sheets of various gray shades. If the colour shades of your sheets are almost identical, add white or black colour and make them darker or lighter.
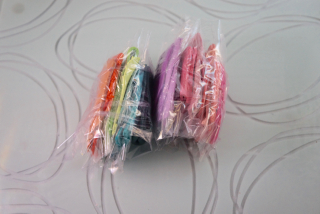
3. Now, prepare five (or more) sheets of different colours and condition them on 3rd thickest setting of your pasta machine. As you can see I used my scrap clay in different colours.
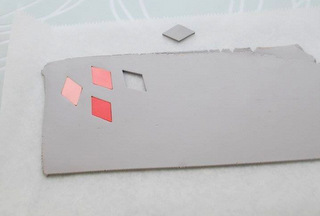
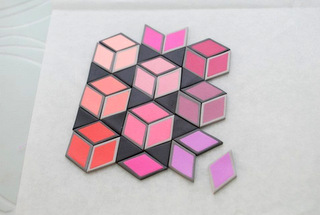
4. Take one of the gray sheets (but not the darkest one) and by means of the smallest cutter cut out rhombi. Fill in the gaps with colour rhombi, as you can see in the picture. When cutting out, bear in mind that each gap needs certain space around for a larger cutter of an identical shape.
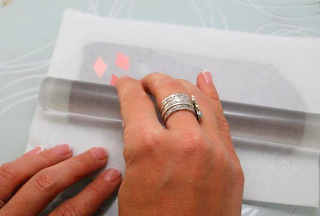
5. Smooth out the sheet with a roller (or a smoothing tool) over deli paper and repeat the procedure with other two gray sheets. All three sheets should contain the same number and the same colours of rhombi but with frames of different shades of gray. I.e. if you have two turquoise rhombi in the lightest sheet, you should have two turquoise rhombi also in other two gray sheets.
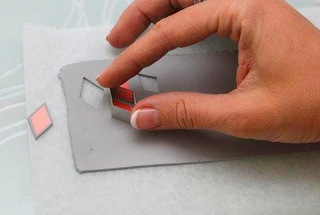
6. Take another cutter (the larger one) and cut rhombi out of the gray sheets. Cut out the shapes very accurately so that the frames have the same thickness everywhere. You get colour rhombi in gray frames.
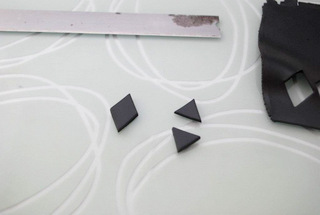
7. Take the larger cutter and cut rhombi out of the darkest sheet. Cut each rhombus into halves and get triangles.
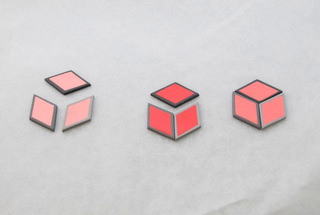
8. Now it is time for the funniest part – assembling! Take 3 rhombi of the same colour (e.g. fuchsia ones) with different shades of the frames.
9. Put them together following the picture and you get a hexagon.
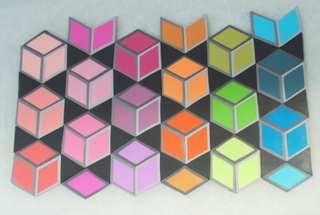
10. Put another hexagon together using another colour. Attach the second hexagon to the first one. Repeat the procedure with other colours until you use all sets of the triangles.
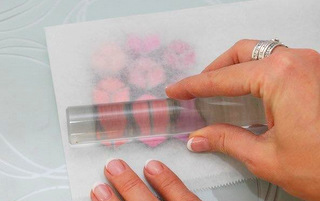
11. Smooth out the sheet over deli paper.
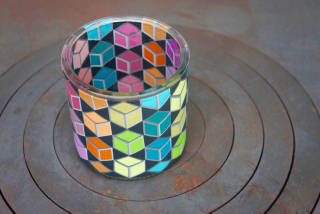
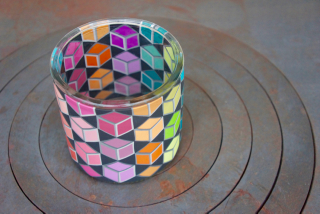
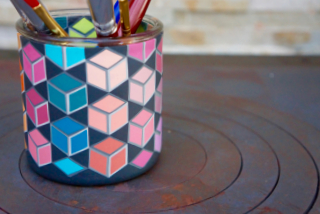
12. And think about what project the sheet will be good for :)
what about a tool holder?
Enjoy the lovely autumn days,
Petra Nemravka