Contacts
Our storage house and office
Nemravka.cz
(areál
K
251 62 Tehovec-Vojkov
How to find us
e-mail: info@nemravka.cz
+420 734 742 604
You can do a purchase or pick up your orders.
Opening hours:
Mo - Fr 8 - 14
General information
info@nemravka.cz
Information about your orders
objednavky@nemravka.cz
+420 734 742 604
Wholesale
velkoobchod@nemravka.cz
Information about polymer clay
petra@nemravka.cz
Information about scrapbooking
scrapbooking@nemravka.cz
- Home
- Useful Links and Tips
- About (Polymer) claying
- POLYMER CLAY PATCHWORK 2016
- Tumbling Patchwork
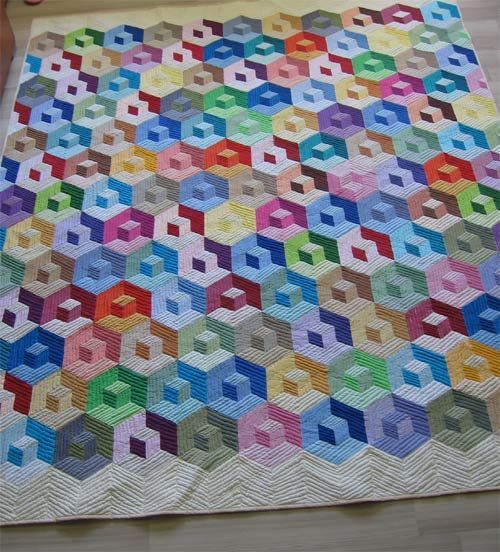
Tumbling Patchwork
To make a decision about next patchwork design was a hard time for me this time. I found several patterns and wanted to try them all. And you know how is it usually. Not enough time (for claying especially!).
Anyway, the autumn is here and for this reason I chose less colourful pattern than the last time. I found my inspiration on a Flickr site by Hatgirl. However I am sure I will use bright colours again, it wasn’t me... Okay, let’s start.
What do you need:
Common tools for work with polymer clay (pasta machine, etc.)
3 different colours of clay, I used Sculpey Premo Accent bronze, copper and violet mixed with pearl.
Millimetre paper sheet or craft mat no. 2 by Nemravka
Ruler
Sharp stiff blade, e.g. NuBlade
Deli paper / another type of paper for smoothing the clay
Smoothing tools (acrylic roller)
Procedure:
1. Condition all colours of clay on medium setting of your pasta machine (Imperia #4). All the sheets should have the same length.

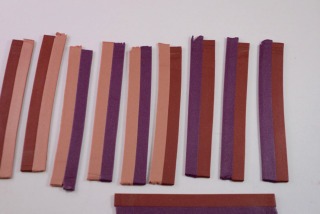
2. From your sheets cut off (lengthways) stripes 0.8 cm wide.
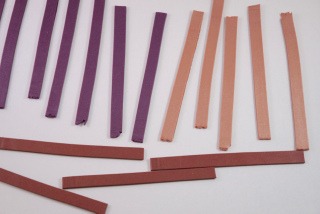
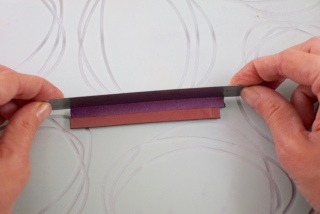
3. Place two stripes of different colours one next to another. Take a piece of deli paper and smooth out the joints through this paper. You can use your own fingers, a spoon, a pebble or another object with a rounded side or a rounded bottom.
Make all (3) possible colour combinations of „double-colour stripes“.
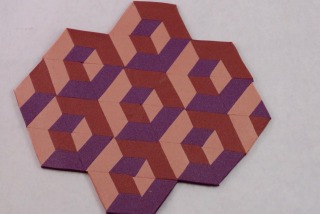
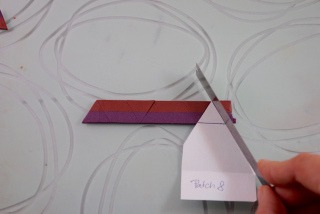
4. A fun part of procedure now – cutting and assembling! Take the first double-colour stripe and cut it in 60°angle from one and also the other side. You should come up with an equilateral triangle.
For those who are lazy and less patient: you can make a template of this triangle. What’s more, you can make marks on a side of the stripe (the base of triangles) and then on the opposite side make marks in between as you can see at a picture.
5. After all this hard work you can take a nap or start assembling these tiny triangles. Work on a sheet of paper – it’s easier for putting all triangles together. Take the first triangle and place another one with the same centre but different outer colour next to another. Then, place the third one with the same outer colour but different centre colour next to the second one. Continue in the same order until you get a hexagon.
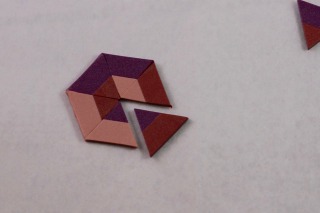
I found that the easier way how to assemble hexagons is make two halves and put them together afterwards.
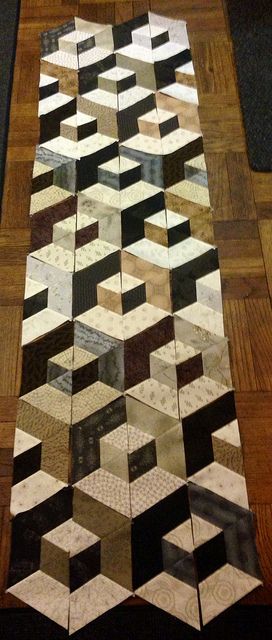
6. Continue in making hexagons – make sure that they are assembled in order as the first one. This is really important for making a pattern visible.
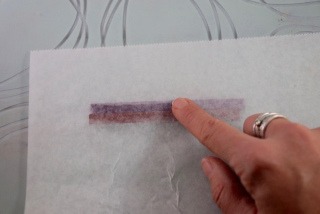
7. Lay a sheet of paper over the clay and smooth out the joints. Put the paper you have used for smoothing out aside and unstick the sheet of the clay from the sheet of paper.
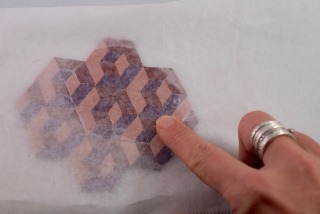
Now, you can think about the use of the sheet.
Send us the result of your work – you can win CZK 3,000 worth of polymer clay stuff.
You can find more information at the website of the project Polymer Clay Patchwork 2016.
Enjoy your time with the clay and „see you soon“!
Petra Nemravka
PS. Okay, colours again but look how nice these are... by Yatak Örtüsü.