Contacts
Our storage house and office
Nemravka.cz
(areál
K
251 62 Tehovec-Vojkov
How to find us
e-mail: info@nemravka.cz
+420 734 742 604
You can do a purchase or pick up your orders.
Opening hours:
Mo - Fr 8 - 14
General information
info@nemravka.cz
Information about your orders
objednavky@nemravka.cz
+420 734 742 604
Wholesale
velkoobchod@nemravka.cz
Information about polymer clay
petra@nemravka.cz
Information about scrapbooking
scrapbooking@nemravka.cz
- Home
- Useful Links and Tips
- Home Decor
- Christmas Wreath
Christmas Wreath

Advent time is here! The time when children cannot wait to see their presents under the Christmas tree. For adults, mostly a time full of stress and tiding up their houses to be prepared….
What about (instead of stress and cleaning) create something nice and warming which can enhance the warmth and cosiness of your homes.
I hope... ![]()
What will it be? Because it’s Advent so what about an Advent wreath including two of my creative loves – polymer clay and knitting...
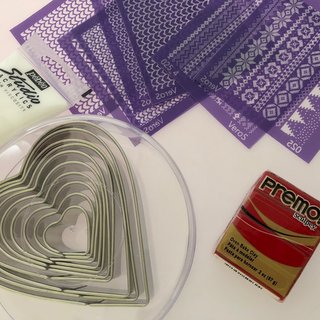
What do you need?
4 blocks of polymer clay – Premo pomegranate red (5026)
Silkscreen stencils by Verostudio with „knitting-Christmas“ motifs
White acrylic paint (e.g. Pebeo)
Heart shape cutters (I use a set of hearts by Staedter)
A base of a wreath – wicker one (e.g.. Nanu Nana) or natural one (you find it in flower shops)
Sparkling beads
Red ribbons
Common tools for working with polymer clay (pasta machine, working mat, tissue blade) and SMOOTH (without a texture) tiles for baking.
Glue gun
Instructions:
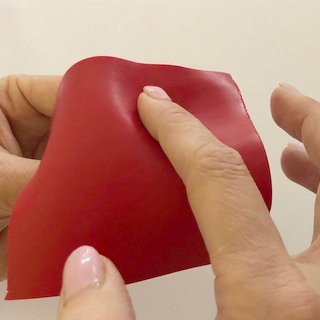
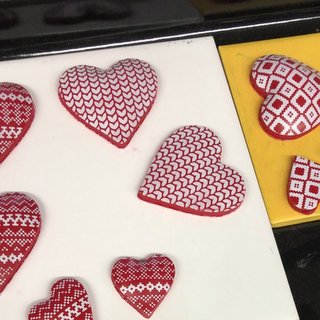
- Condition your red clay at the second thickest setting of your pasta machine (I use Imperia). Choose one of your stencils. Lay it down on your clay so you can read a name of the stencil. Smooth onto the clay. Apply white paint with an old credit card, a brush or whatever suits you. If you don’t know how to use silkscreen stencils you can read it here.
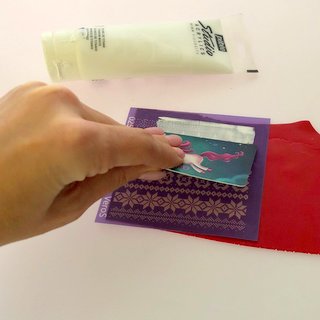
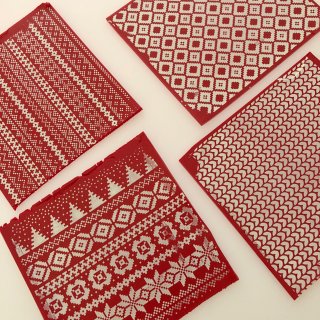
2. Repeat this step until you get 5–6 sheets with different patterns.
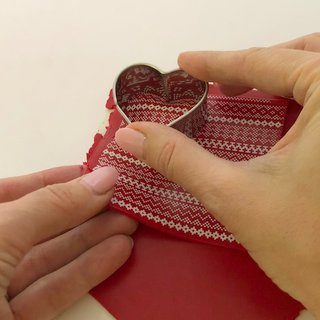
3. Take a tile for baking and a red sheet of clay (second thickest setting). Put this sheet on the tile, smooth it. Take a cutter to your hand and find a place which you like. I recommend you to choose the place close to the edge (5 mm from the edge) so you can use the sheet again.
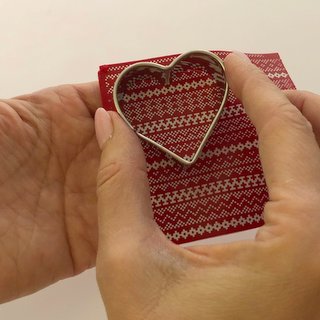
5. Turn your sheet of clay with the cutter upside down and push the clay through the cutter. Don’t forget to push it through whole shape of the heart. If you have long nails you can use a big ball stylus or some other tool with a round shape.
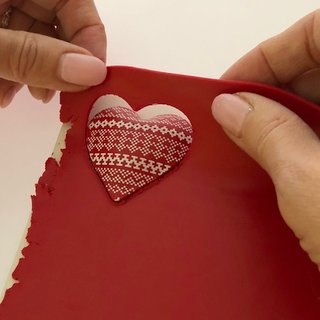
6. Turn your cutter with pushed clay back again and place it onto a sheet of clay placed on the cutter. Be careful you don’t place it off the sheet of base clay (it has happened to me many times). Push the cutter down and cut through both layers of clay. I always hold the top layer with my left hand to protect layers from glueing together. Then I can use the rest.
7. Pull away the rest of clay. I recommend to stretch the clay a bit to protect the heart from a distortion.
8. Repeat the process with all sheets of clay.
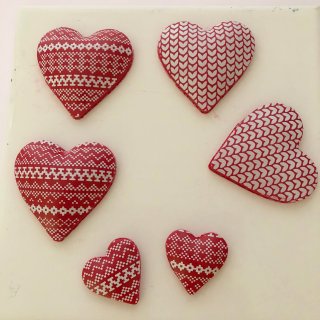
9. Bake the hearts according to the clay manufacturer's instructions.
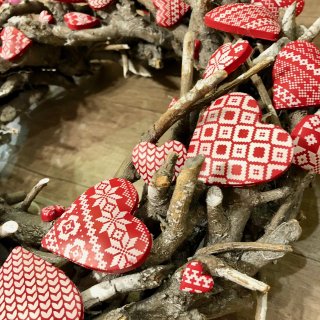
10. After cooling down, glue the hearts onto a wreath with a glue gun. You can decorate the wreath with beads or/and ribbons.

You can make these hearts in different sizes and use it also for decorating your Christmas tree, X mas decorative hangings or a part of Xmas gift wrapping.
We wish you a pleasant and joyful Advent time and a enjoy creating of your wreath.
Petra Nemravka
Nemravka.cz