Contacts
Our storage house and office
Nemravka.cz
(areál
K
251 62 Tehovec-Vojkov
How to find us
e-mail: info@nemravka.cz
+420 734 742 604
You can do a purchase or pick up your orders.
Opening hours:
Mo - Fr 8 - 14
General information
info@nemravka.cz
Information about your orders
objednavky@nemravka.cz
+420 734 742 604
Wholesale
velkoobchod@nemravka.cz
Information about polymer clay
petra@nemravka.cz
Information about scrapbooking
scrapbooking@nemravka.cz
- Home
- Useful Links and Tips
- About (Polymer) claying
- Polymer Clay Jewelry
- Lentil Earrings
Lentil Earrings
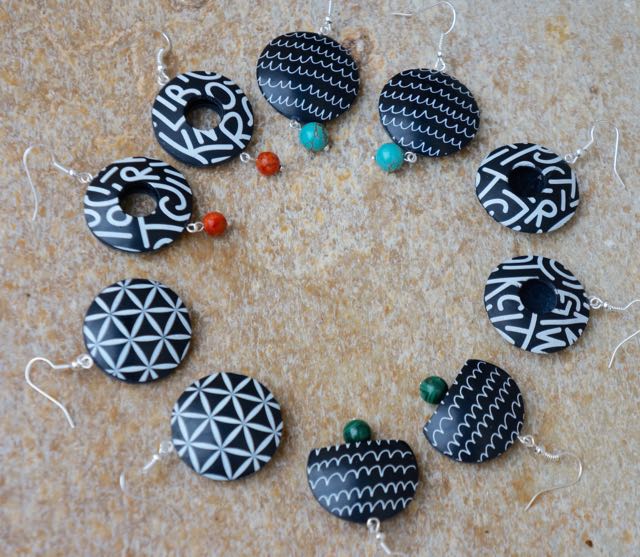
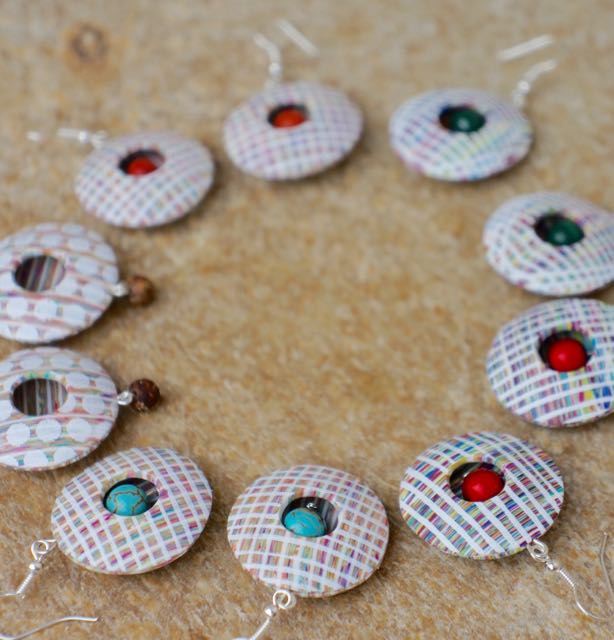
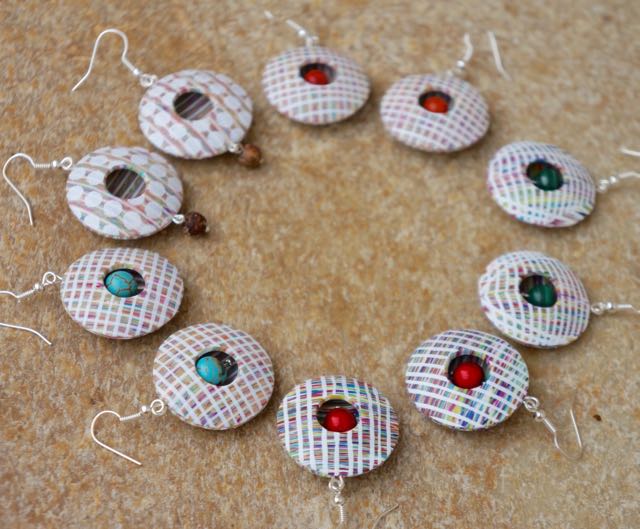
I am fascinated by rounded shapes… moreover, these ones remind me of favorite candies of my children (and of my childhood) – chocolate lentils (smarties).
They are hollow (thus light) earrings made of two parts stuck together after baking.
I showed how to create them in the live TV show Snídaně s Novou.
Let´s create them following this tutorial.
Material and tools you need (in the order they are used):
common tools for polymer clay work – i.e. craft mat, pasta machine, tissue blade
polymer clay – Premo clay in this case
deli sheet or plastic sheet
silk screen – I am using Moiko
white acrylic paint, e.g. Artiste, Pebeo or Ranger Dabber
round cutter 3 mm Ø (or another size of earrings you prefer)
moulds for convex shapes, e.g. by Sculpey or these no name ones
liquid polymer clay, e.g. by Sculpey or Kato Polyclay for smooth surface
For finishing:
craft knife (X-ACTO blade)
abrasive grid on plasterboard or coarse sanding paper, next 400, 600, 800 grit sanding paper
quality quick-drying adhesive (e.g. Loctite gel)
small drill – I am using a Kemper drill
headpins and afro fishhooks
others, e.g. beads for decoration
Procedure:
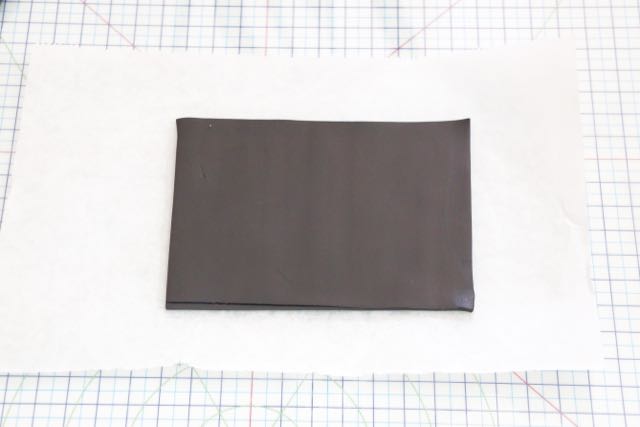
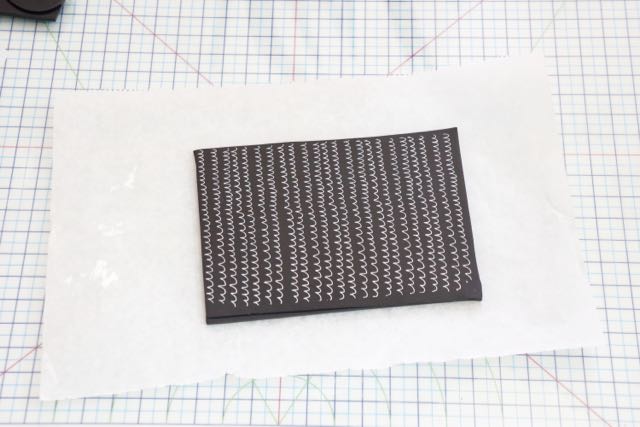
1. First of all condition black clay on medium setting (#4 setting of Imperia pasta machine, or 6 playing cards) and roll out a rectangle the size of which corresponds to size of the silk screen. Place it on the sheet.
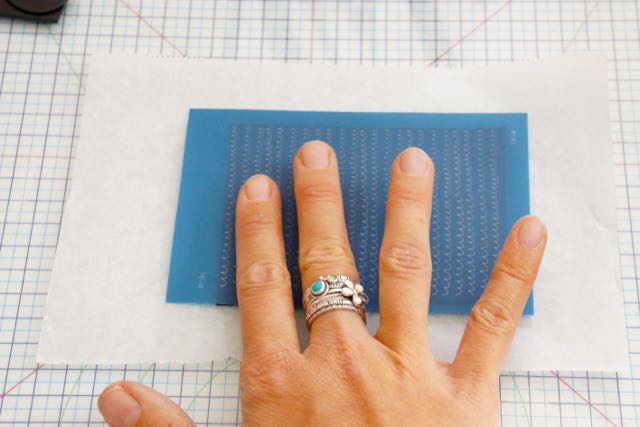
2. Now, put the silk screen on the clay so that its functional layer adheres to it. It is easy with Moiko silk screens because the name Moiko is readable (not reversed). In terms of other silk screens, the functional layer is the one with embossed structure visible from certain viewing angles. Always place this side of silk screens on clay. The reverse side is completely smooth and is „plastic“ to the touch.
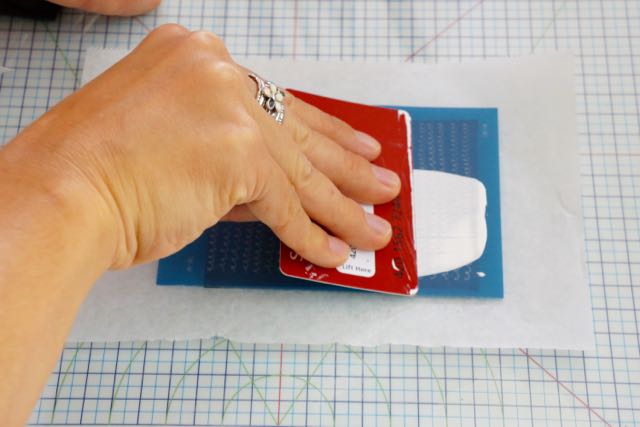
3. Take an old credit card/ spatula and apply a little acrylic paint to it. Spread the paint by means of the card over the whole surface of the silk screen. Wipe off excessive paint. Work fast and as soon as you finish dip the silk screen into water (prepare it in a bowl or rinse it under running water)
4. Isn´t it lovely? The motifs of the silk screens are particularly beautiful especially when colour of clay contrasts with colour of acrylic paint. Silk screens are also perfect with blended clay (and with embossing powder in this case) - the effect of gradual uncovering of the silk screen motif is amazing.
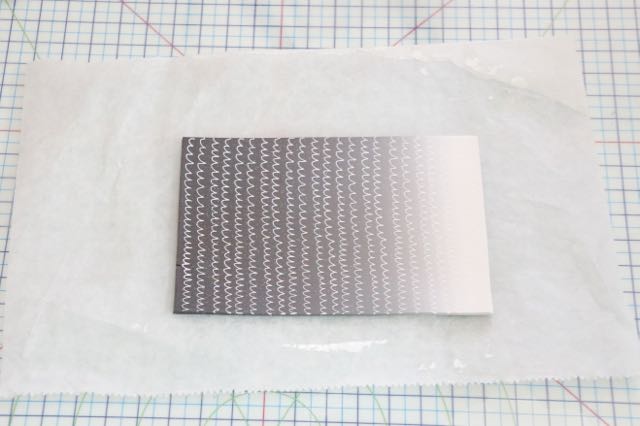
TIP: The paint should be completely dry within ca 5 minutes. Be careful if it is not (e.g. Koh-I-Noor paints are not suitable for work with silk screens). Artist, Sculpey, Pebeo and Ranger Dauber are the most commonly used paints for work with silk screens.
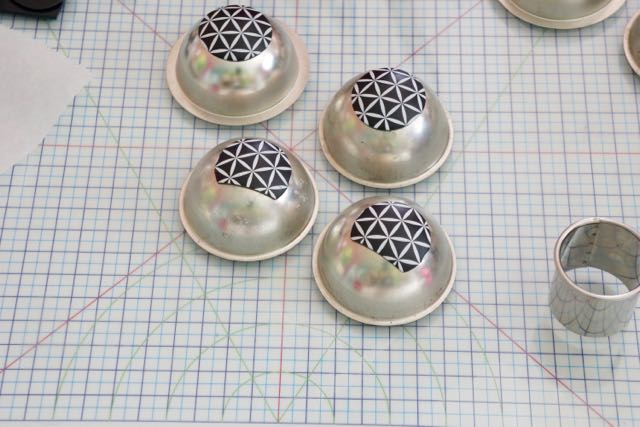
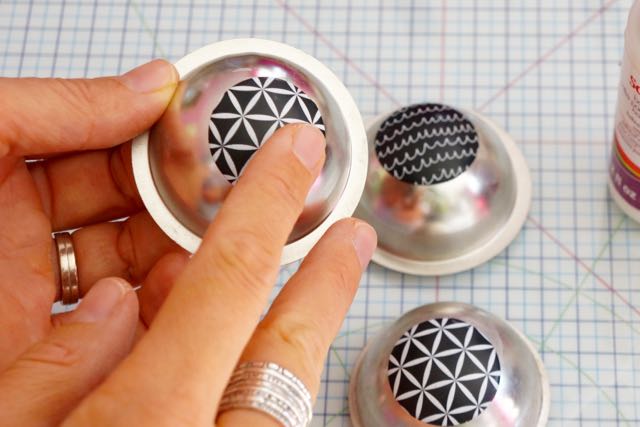
5. When the acrylic paint gets dry, cut out even-numbered rounds - 4 rounds for a pair of earrings.
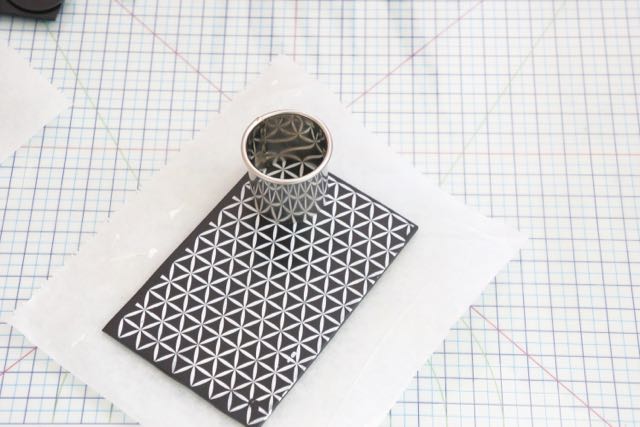
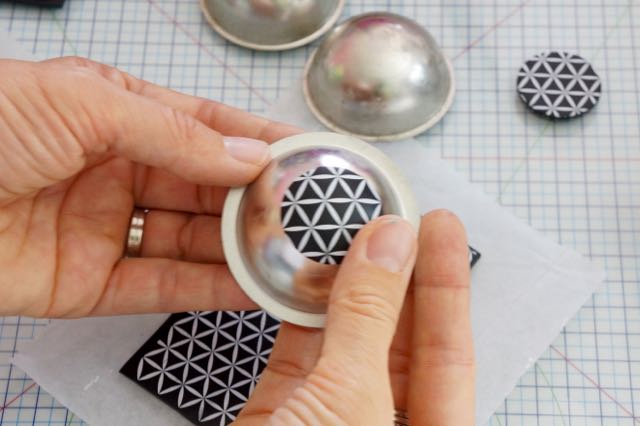
6. Place the rounds on convex moulds and smooth them. Check the edges to fit tightly to the moulds. The halves of the earring have to adhere one to another. Follow the manufacturer´s baking instructions.
8. After baking and cooling apply little amount of liquid polymer clay to protect the surface from rubbing and bake 15 more minutes (or fix it using heat gun).
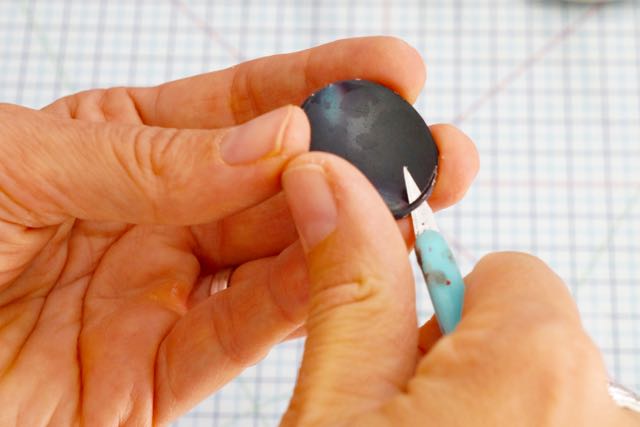
9. Let it cool. Trim excessive clay on edges, i.e. cut evenly the outer edges (the halves must adhere one to another). Do not try to be perfect, just get rid of excessive clay. The rest will be sanded.
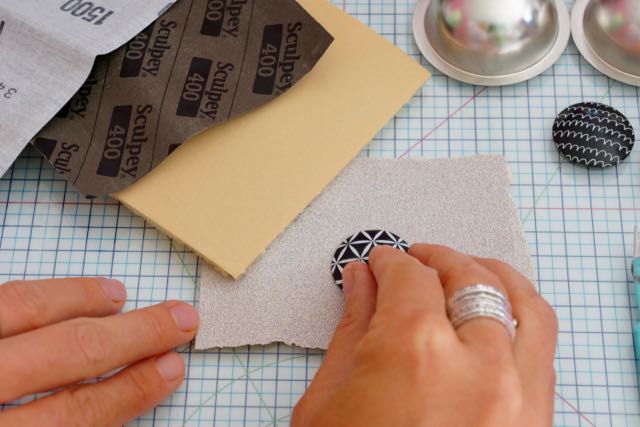
10. Take sanding grid and sand edges of the halves coarsely. Continue with 400 grit sanding paper. The edges do not have to be perfectly smooth. Check whether the two halves match. Small bumps at outer edges can be sanded after being glued together. What is really effective is sanding jewellery with sanding paper intended for plasterboard at the edge of the desk (in order to fix the hemi-sphere).

11. Apply little amount of adhesive to the sanded edges. I found it effective to apply adhesive by means of a long headpin – the eye of the headpin controls the amount of applied adhesive.
12. Join the two pieces – check whether the pairs of halves match. Let the adhesive work for 10 minutes. In the meantime, sand
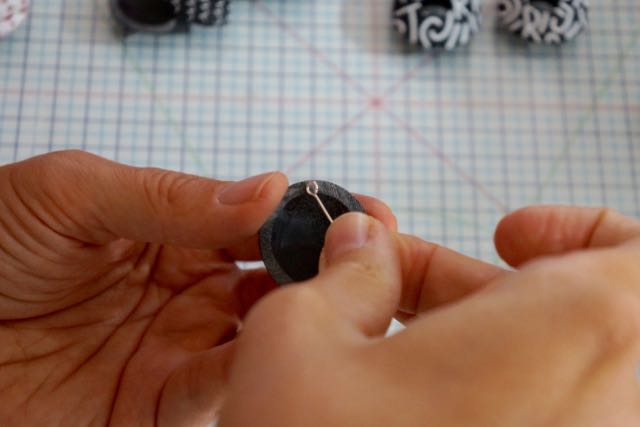
overhanging edges with 800 grit sanding paper. Drill a hole for a headpin between joints.
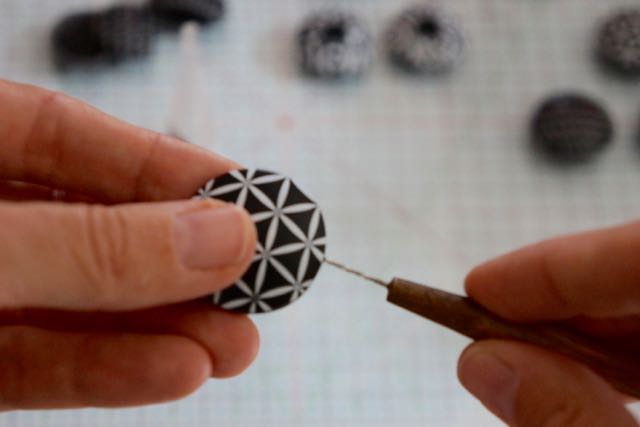
14. Dip the headpin into adhesive and stick it into the hole. From the front view of the earring the entire eye has to visible.
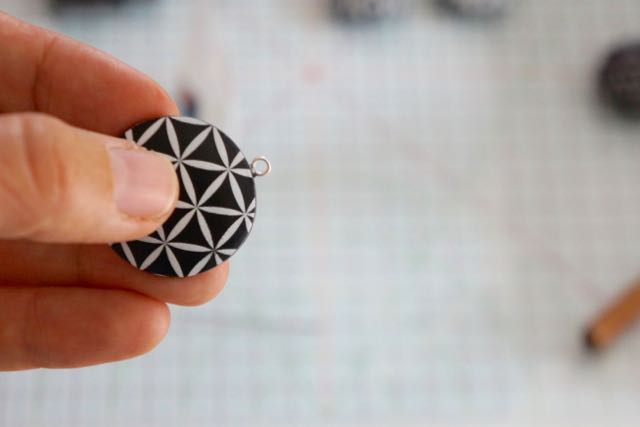
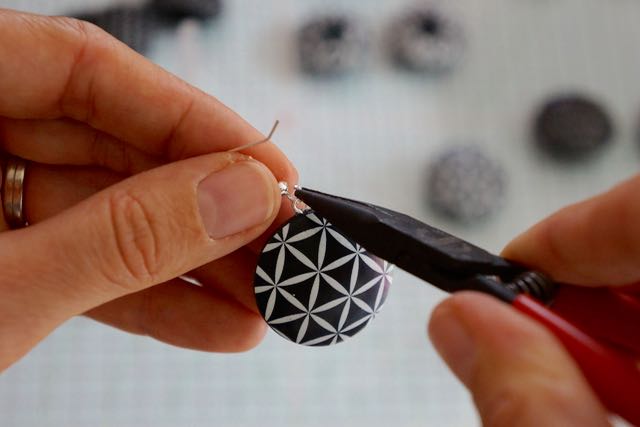
15. Attach an earring hook to the headpin and that´s it!
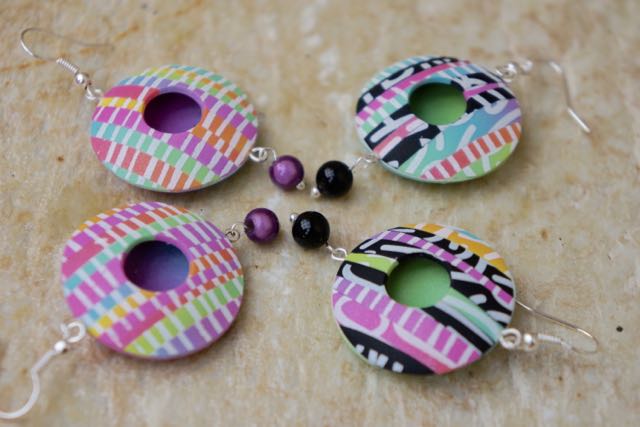
As you can see there are many variations of making the earrings – e.g. the hole can be drilled in the front side, or the third bottom part of the earring can be cut-off. It is also interesting to underlay the back side with striking colour clay (if the hole is in the front side or the bottom part is cut-off). The earrings can also be embellished with beads.
Application to striped base clay results in cubes.
Try out putting dots over stripes.
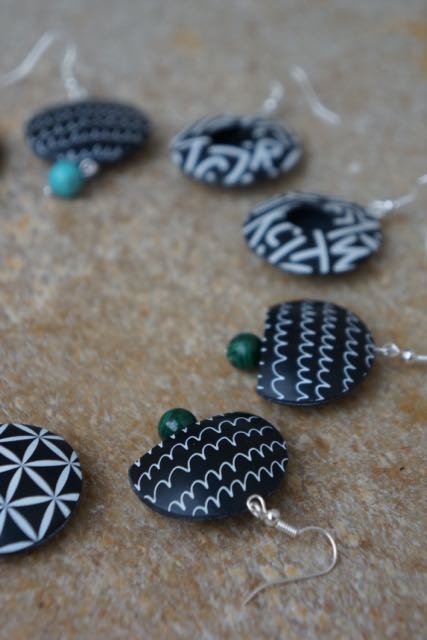
Do you like bells?
Colour scraps with silk stencil patterns joined together.