Contacts
Our storage house and office
Nemravka.cz
(areál
K
251 62 Tehovec-Vojkov
How to find us
e-mail: info@nemravka.cz
+420 734 742 604
You can do a purchase or pick up your orders.
Opening hours:
Mo - Fr 8 - 14
General information
info@nemravka.cz
Information about your orders
objednavky@nemravka.cz
+420 734 742 604
Wholesale
velkoobchod@nemravka.cz
Information about polymer clay
petra@nemravka.cz
Information about scrapbooking
scrapbooking@nemravka.cz
- Home
- Useful Links and Tips
- About (Polymer) claying
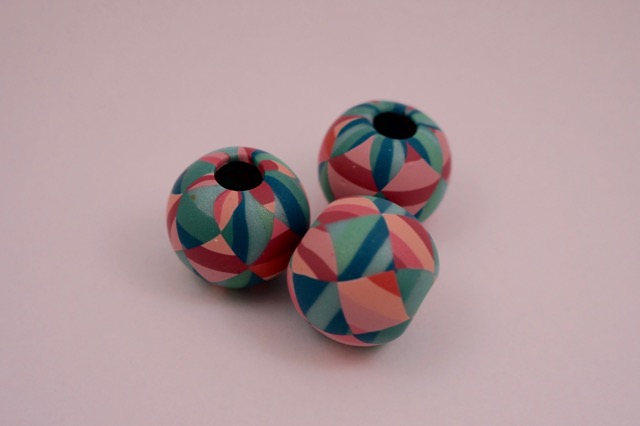
- POLYMER CLAY PATCHWORK 2016
- Pillow Check Patchwork
Pillow Check Patchwork
The end of march is breathing down my neck, Clay Fest is approaching and I am busy with its organization. However, I cannot deny myself the pleasure to present you the march patchwork project. It has already been prepared in my camera, so I have put it out today, added a text and here is the new inspiration for you.

I drew inspiration in one of VierMa´s newsletter notifying about new striped fabric in stock (and I always find it difficult to resist and not to buy any). Have a guess who designed it! Yes, Kaffe Fassett! On top of that there were finished pillows made by Katka Novakova.
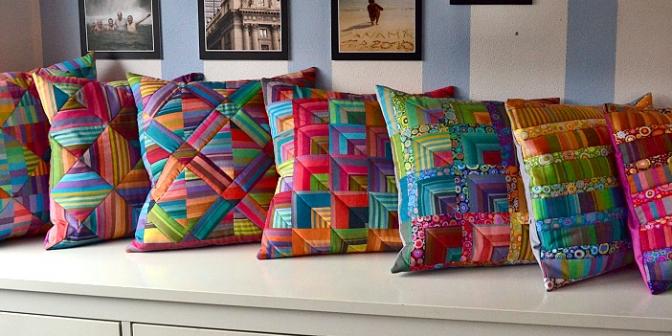
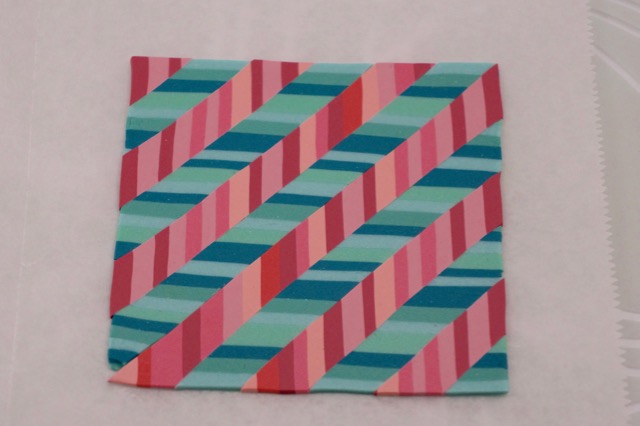
Moreover, I have to alert you to the pillows of Katka – opening her websites is dangerous because the pillows are simply gorgeous. You can see them in the picture above. So, I decided to try to apply one of the designs to polymer clay. Inspiration of these pillows is inexhaustible (as well as patchwork designs in general) and stripes can be used in many ways. I greatly recommend you to use more colours than I am using in this project.
For this check patchwork you need the following:
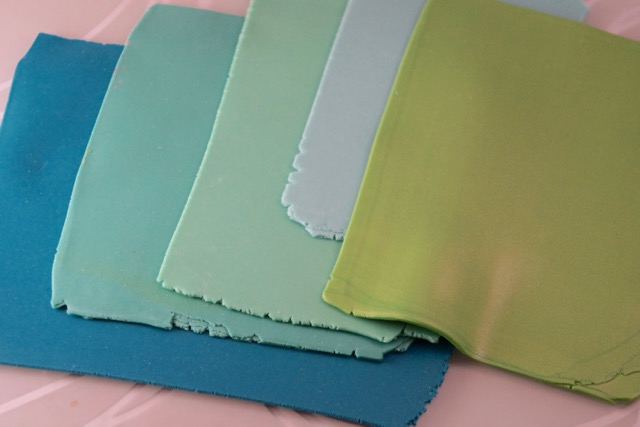
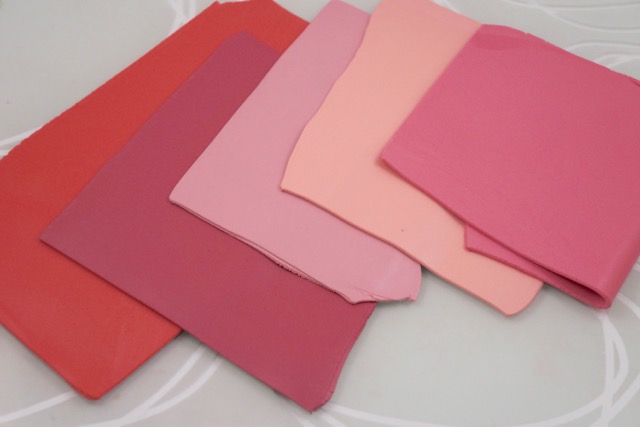
Conditioned polymer clay sheets (I am using Premo clay) of at least two colours in several shades.
Craft mat witha measuring grid.
Solid and sharp blade.
And a bit of precision.
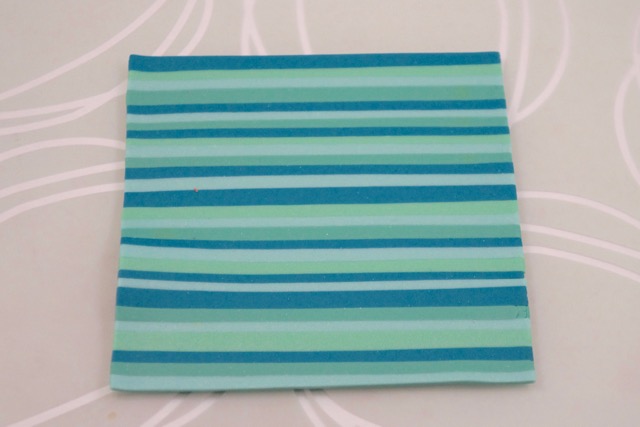
1. First of all, condition the sheet at the medium setting of the pasta machine (# 4 with my Imperia). The width of the sheet is ca 10 cm.
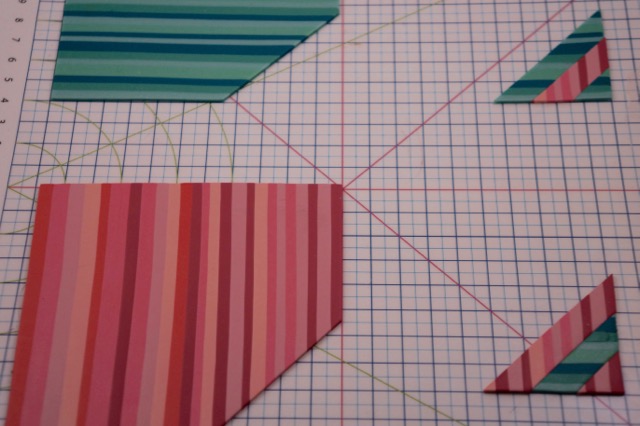
2. Take the clays of one colour and make a striped sheet. Trim the edges. Cut off 2 – 5 mm wide stripes and lay them one next to another. The picture below shows that for transferring the stripe I stick it to the blade and place it at the end of the striped sheet.
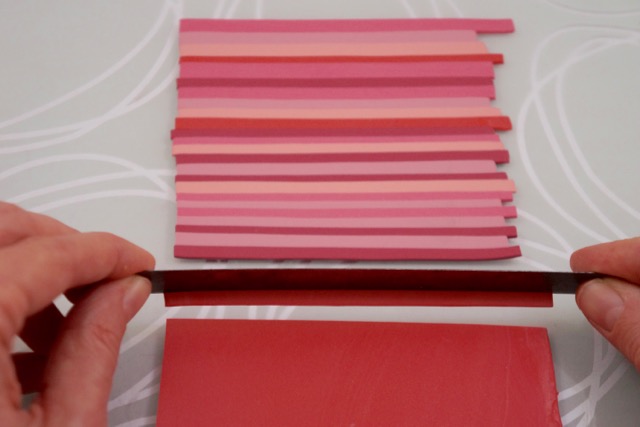
3. Take notice of the way I attach the stripes to the striped sheet. First, I press the stripe against the striped sheet by means of the blade and then I tilt the blade towards myself, so the stripe does not move and remains stuck to the sheet.
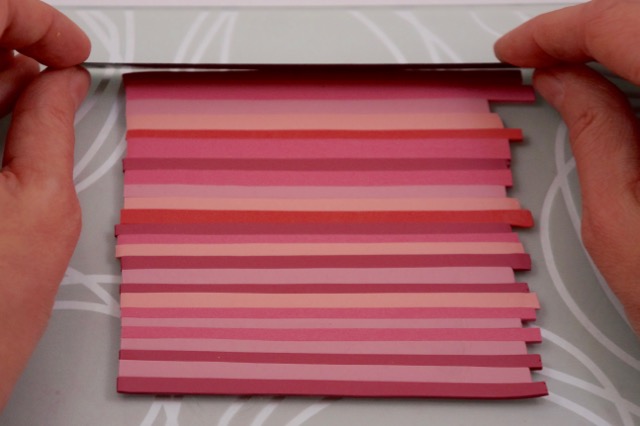
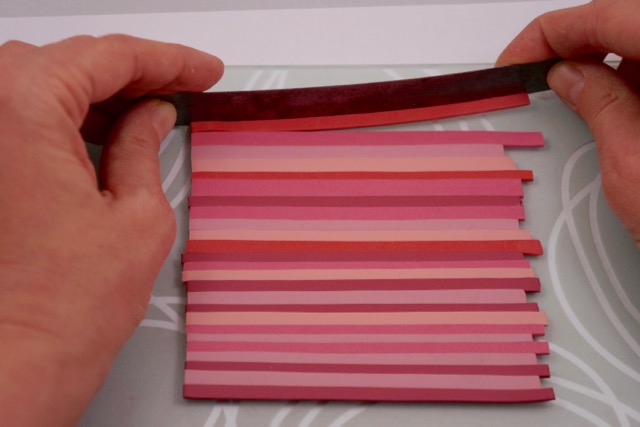
4. Or, you can bend the blade slightly and press the stripe against the striped sheet step by step by means of this bent blade. The degree of bending makes the clay stretch or shrink. This method is particularly useful when creating the check pattern – connection of the squares is under you control. Moreover, this method helps you make one of the edges even – the one you start with (it is the left edge in my project).
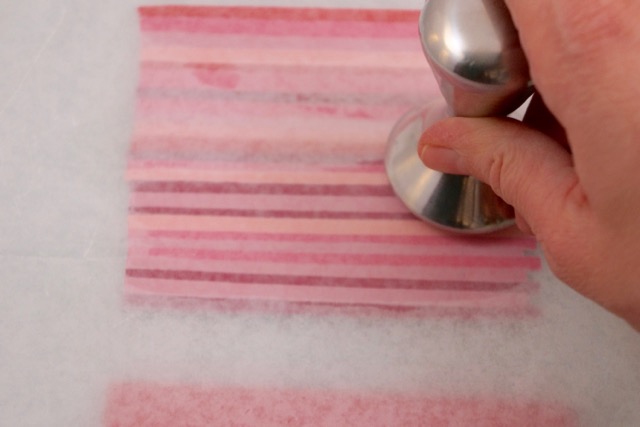
5. Take deli paper and smooth out the joints of the stripes over it. Use a roller, a pebble, a spoon or another „smoothing“ tool.
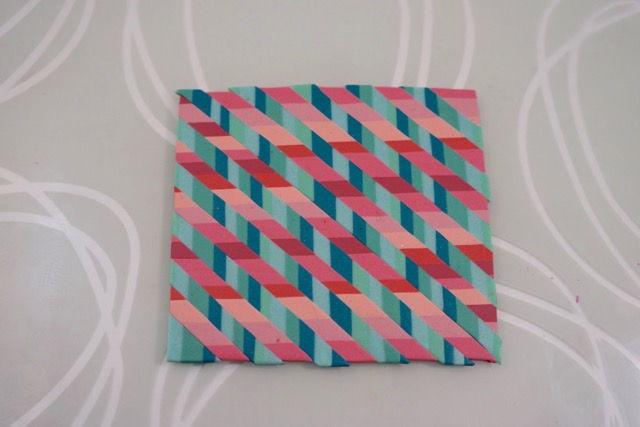
6. You get a sheet of ca 10 x 10 cm. Trim the edges.

7. Repeat the process with the second colour of the clay and its shades. Creativity has no boundaries, so feel free to experiment with the colours.
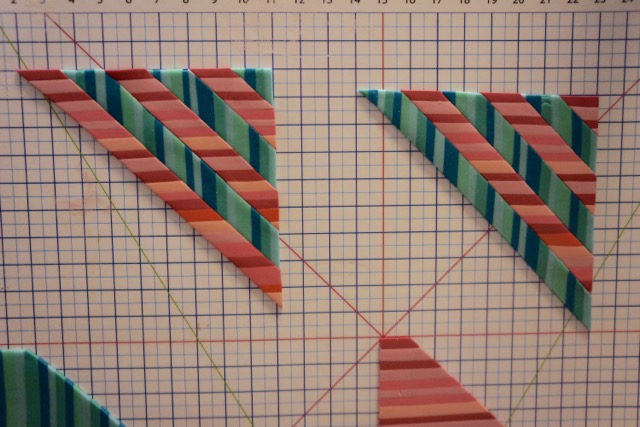
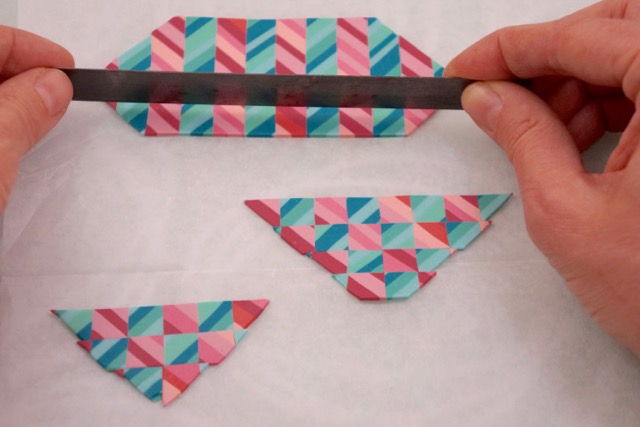

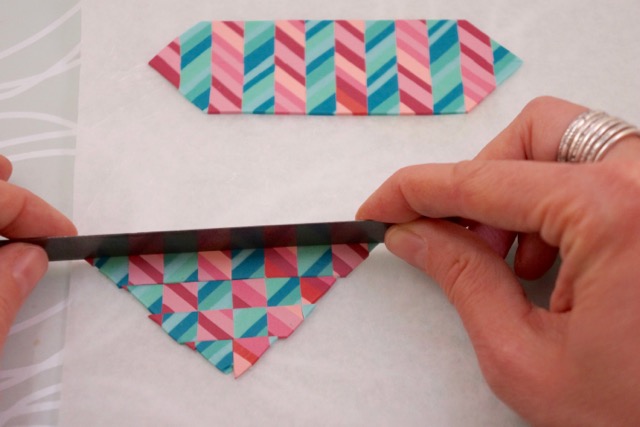
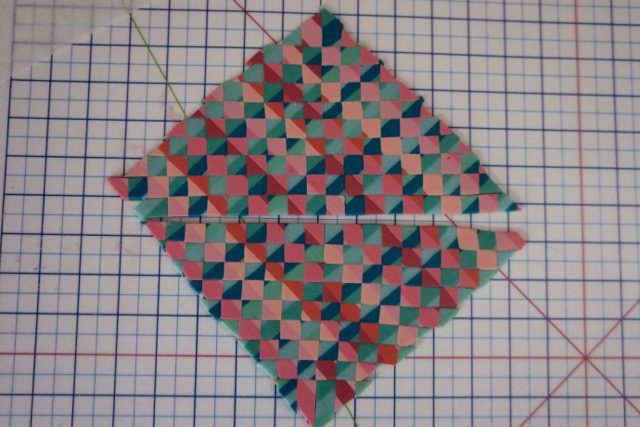
13. Smooth out the triangles over deli paper, unstick one of them from the mat and attach it to the other one to get a new square. Smooth the central joint and think about the use of the sheet.

 ).
).