Contacts
Our storage house and office
Nemravka.cz
(areál
K
251 62 Tehovec-Vojkov
How to find us
e-mail: info@nemravka.cz
+420 734 742 604
You can do a purchase or pick up your orders.
Opening hours:
Mo - Fr 8 - 14
General information
info@nemravka.cz
Information about your orders
objednavky@nemravka.cz
+420 734 742 604
Wholesale
velkoobchod@nemravka.cz
Information about polymer clay
petra@nemravka.cz
Information about scrapbooking
scrapbooking@nemravka.cz
Neon Patchwork
Summer is the perfect time for wearing cheerful colours, striking contrasts and large. bright jewellery. Not only for that reason (besides that I have already had this idea in my mind) the June patchwork is just like that.
I do not know the "patchwork" terminology, so I am not going to tell you whether the design is check or something else. But it looks perfect on pendants, bracelets and earrings. However, thanks to the straight lines the design is suitable also for connecting cylinder beads.
Well, I have just learnt that this design is called convergence – thank you Helena!
Do not forget to leach the clay. It is important for composition of the design.
You need the following:
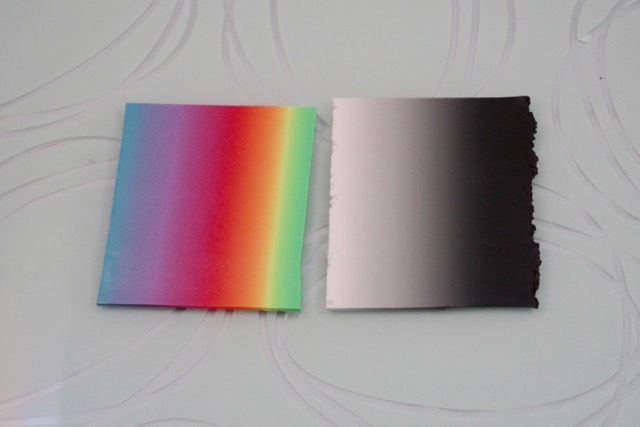
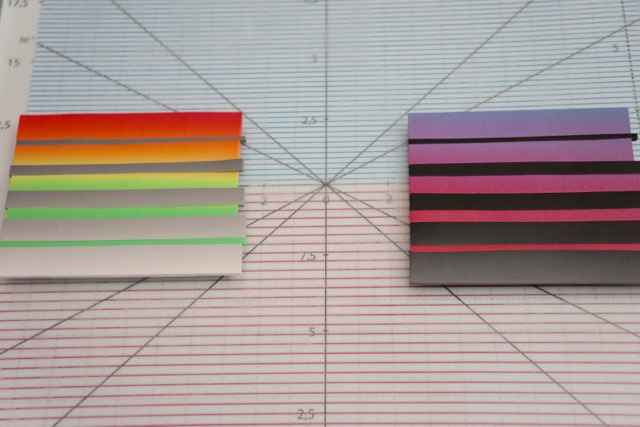
1 black-and-white blend of clay (ca 6 x 10 cm)
1 neon blend (ca 6 x 10 cm) – the blend is made out of the following colours of Premo clay: neon yellow, neon pink and turquoise
millimeter paper sheet or craft mat no. 2 by Nemravka
sharp blade
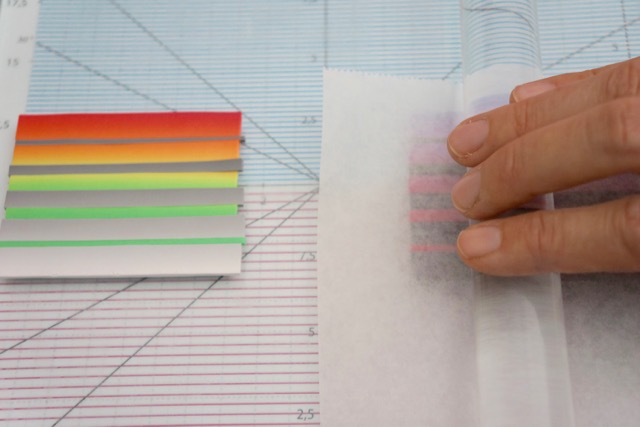
printing paper for leaching the clay
a template and a baking bowl for shaping and baking the sheet, finishing components
Procedure:
1. Condition both blends on medium setting of your pasta machine (Imperia #4).
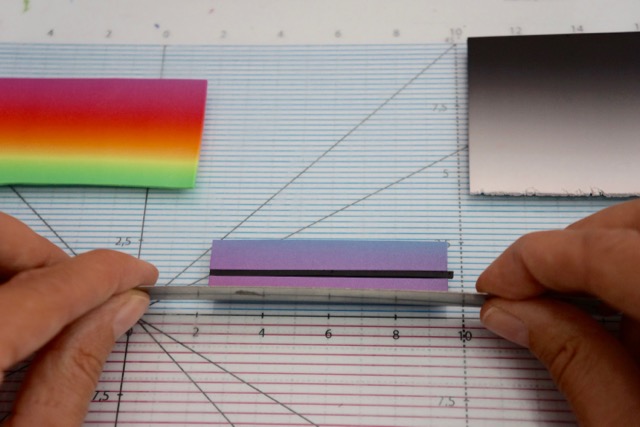
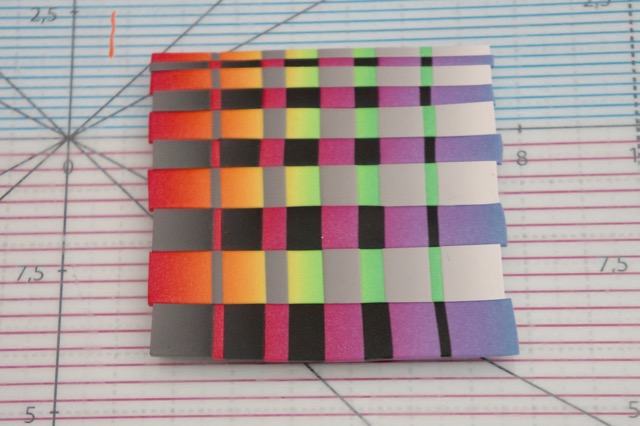
2. Lay the blends on the mat horizontally, i.e. the colours of the stripes change from top to bottom. Now, you are going to cut off horizontal stripes 2 to 10 mm thick.
First, take the colour blend, cut off the first 10 mm thick stripe and place it on the mat between the blends (or put it aside somewhere else), as you can see in the picture. Take the black-and-white blend and cut off the thinnest 2 mm thick (non-colour) stripe. Transfer this stripe on the colour one by means of the blade and push it slightly down. To avoid sticking the clay to the blade, peel the top part of the stripe off the blade first, not the entire surface at a stroke. But you know that, I have already described it in the previous projects.

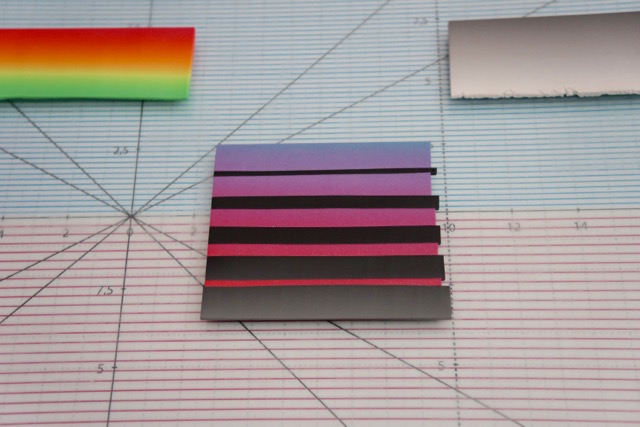
3. Go on cutting off: the stripes of the colour blend are gradually thinner and thinner (i.e. 8, 6, 4 and 2 mm) and, vice versa, the black-and-white stripes are gradually thicker and thicker (i.e. 4, 6, 8 and 10 mm).
4. The last stripe of the new sheet is the 10 mm thick non-colour one.
5. Repeat the procedure with the remaining blends and make the second sheet.
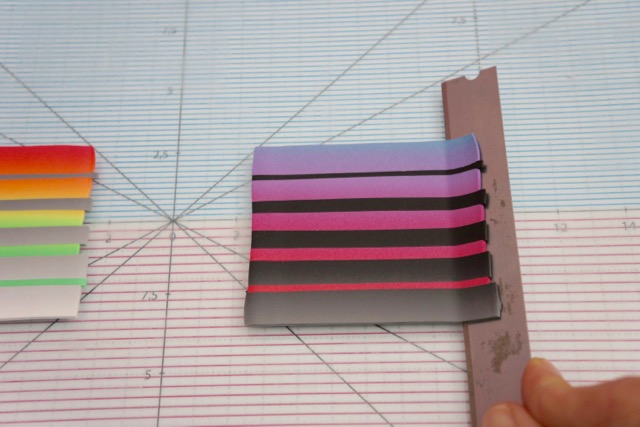
6. Smooth out the joints of the sheets over deli by means of the roller – when rolling, follow the direction of the stripes. Otherwise, the stripes turn into waves.
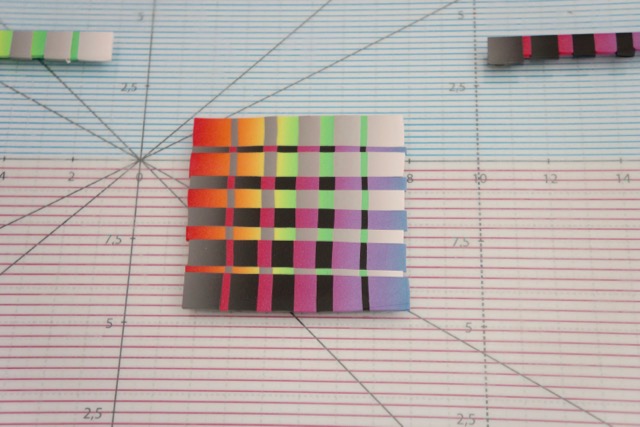
7. Unstick the sheets from the mat and turn them 90°. The sheets are ready for cutting off new stripes in the opposite direction (see the picture).
8. Now, you have two options:
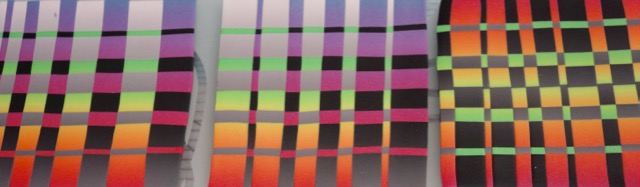
1/ The first one: Cut off 2 mm thick stripes from both sheets. Then cut off 4, 6, 8 and 10 mm thick stripes and alter the sheets. The final design consists of thin stripes on one side expanding into large stripes on the opposite side.
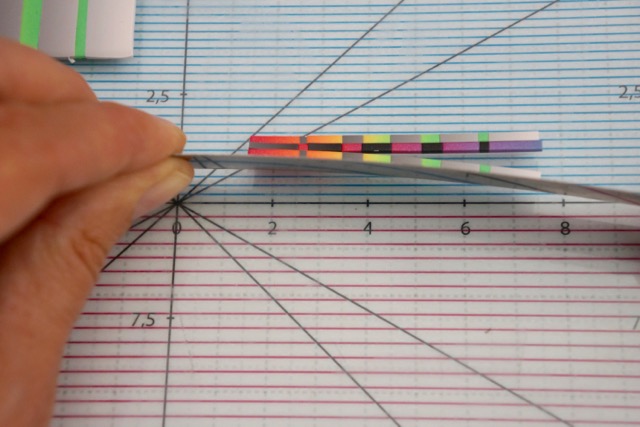
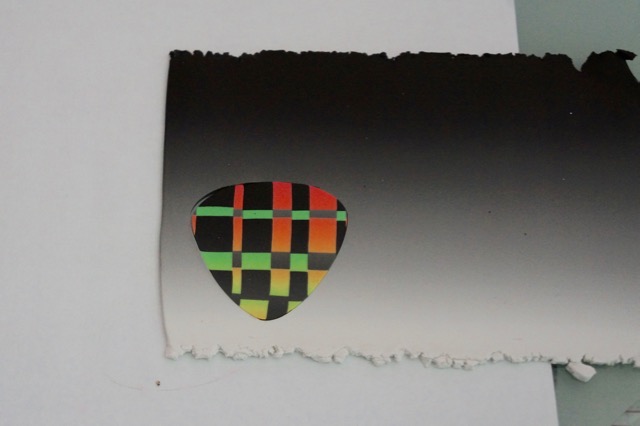
This is how the final sheet looks like.
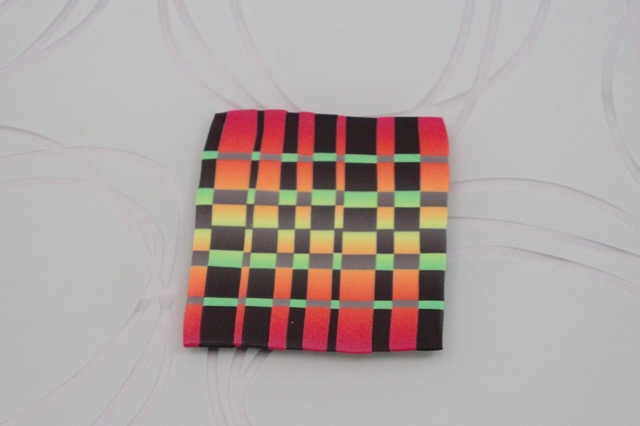
2/ Second option: Cut off a 2 mm thick stripe from one sheet and a 10 mm thick stripe from the other sheet. Go on following the instructions described in the points no. 2 to 4. The colour stripes prevail on one side of the final sheet and non-colour stripes are dominant on the opposite side.
9. One more puzzle: work only with one sheet. Cut off the first stripe, cut off the second stripe, turn the second one 180° and join it with the first one. The stripes in the center of the final sheet have similar colours, as well as the edges. This design is perfect for earrings because most women want them to be identical.
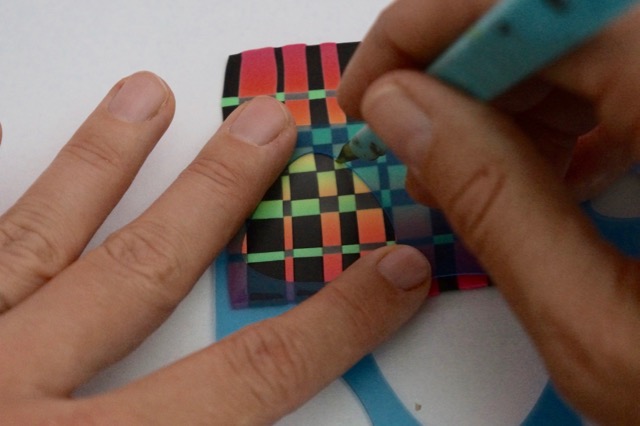
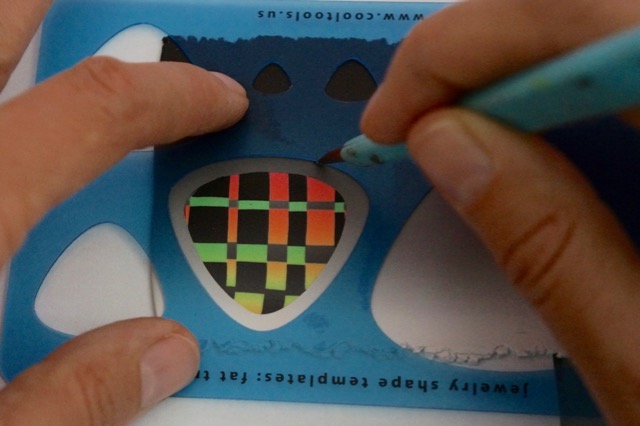
10. The template technique by Melanie Muir is perfect for further steps of the project:
First, choose a part of the design you like the most. To avoid sticking the sheet to the template, dust it with powder. Place the template on the chosen part of the sheet and cut out the required shape with the blade/point.
11. Take the black-and-white sheet and cut out the same shape of the same size. You get a kind of window for the colour shape. Put the colour shape inside. Smooth out the joints over deli.
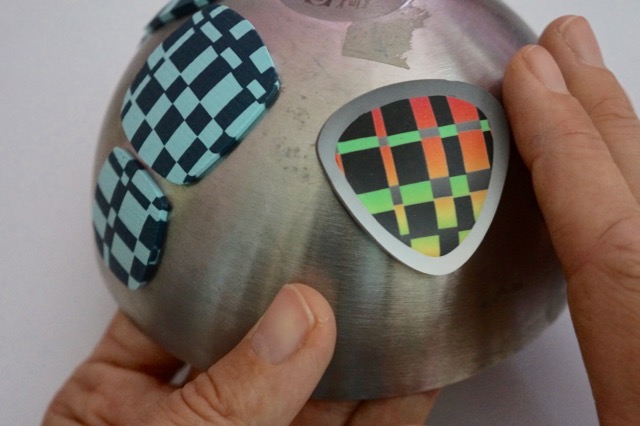
12. Choose the same shape of the template, but one size larger, and cut it out (see the picture). You get the frame. If you are making earrings, repeat the points no. 10 to 12 once again.
13. Bake the earrings on a rounded base, e.g. a bowl. When the clay is baked and cooled, attach the components to it. Or, make the bottom part of the earrings and bake it again.
Have a cup of coffee and dream about where to set off with the striking earrings.
Enjoy the summer!
Petra Nemravka