Contacts
Our storage house and office
Nemravka.cz
(areál
K
251 62 Tehovec-Vojkov
How to find us
e-mail: info@nemravka.cz
+420 734 742 604
You can do a purchase or pick up your orders.
Opening hours:
Mo - Fr 8 - 14
General information
info@nemravka.cz
Information about your orders
objednavky@nemravka.cz
+420 734 742 604
Wholesale
velkoobchod@nemravka.cz
Information about polymer clay
petra@nemravka.cz
Information about scrapbooking
scrapbooking@nemravka.cz
- Home
- Useful Links and Tips
- About (Polymer) claying
- Polymer Clay Jewelry
- Beads - Made of algae and spume
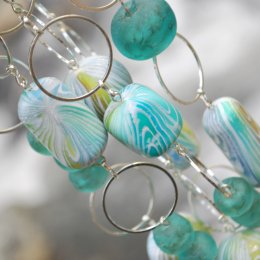
Beads - Made of algae and spume
Beads - made of algae and spume
Mokume Gane is one of the techniques the outputs of which have many forms. What they all have in common is stacking sheets of clay (and other material), follow-up slicing and the achieved result effects. Moreover, I love inks. Combination of mokume gane and inks can result in summer beads of various shapes and colours of sea. So, let´s begin!
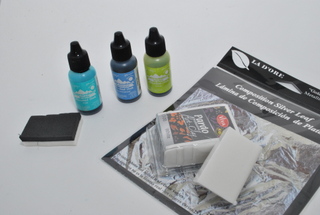
For creation you need following:
1 block of white Polymer Clay (Fimo, Pardo, ..)
½ block of transparent clay
silver metal leaves (1 sheet)
scrap clay for stuffing the beads
alcohol inks: turquoise (Ranger Adiondack, „Pool“ colour), viridiscent („Citrus“) and blue („Stonewashed“)
sponge / brush for ink application
pasta machine, roller, blade, skewer / needle
stringing material
1.First of all, condition transparent clay on the thickest setting of your pasta machine. You get ca 5 mm thick sheet. Trim the edges.
2.Next, condition white clay on the second thinnest setting of the pasta machine (1/4 of clay is enough). The sheet should be at least as large as the transparent one. Place the white sheet on the transparent one and roll them out. Trim uneven edges to get a regular rectangle.
3.Now, pass the sheet through the thickest setting of the machine, the shorter side of the rectangle goes first. The sheet will stretch out.
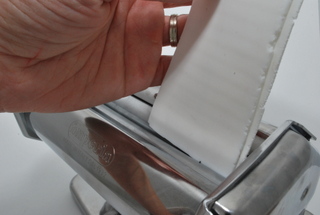
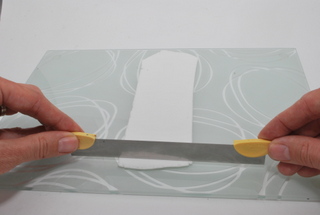
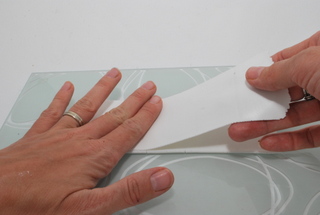
4.Take the silver metal leaf – put it on the paper it was wrapped in. Press the sheet against it, white side on top. If the sheet is longer than the leaf, trim the edges and press them together again. Cover the whole surface.
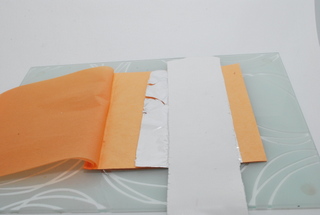
5.Place the sheet on the mat: metal side on top, shorter side of the rectangle towards you. Trim the short side – keep the blade at a slight angle (45° towards you). Do the same with the second short side.
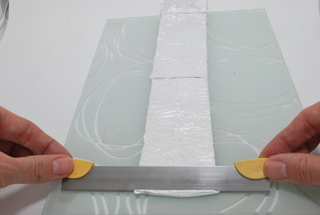
6.Turn the clay into a spiral. There should be no gaps between the layers. If you find some, press the roll gently and roll it again. Trim the edges.

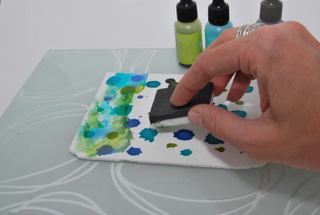
7.Prepare a sheet of white clay on medium setting of the pasta machine. Trim uneven edges. Put a few drops of ink on the sheet. Spread them with sponge (or dabber for inks or a soft brush). Get the ink dry (for several minutes). It must be completely dry when you touch it.
8.Condition scrap clay and roll it up on a skewer.
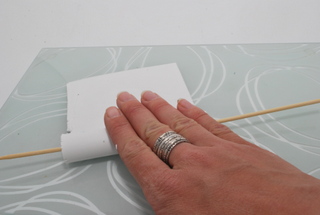
9.Now, cover the roll with the inked sheet. I recommend you to use gloves because the sheet is not always dry (especially when you apply too much ink). At the spot where the ends of the sheet overlap, a groove appears. Trim the sheet right at the groove.

10.Connect the edges and smooth them out (use a needle or roll them out).
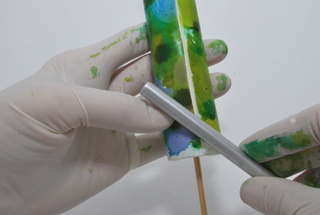
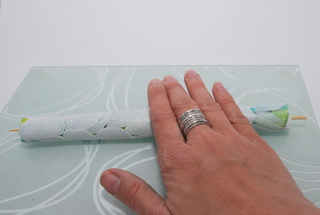
11.Roll out the roll. The roll in the picture has 2 cm in diameter.
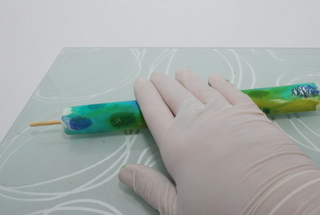
12.Cut off thin slices from the spiral roll. The more oblique the cut is, the more visible silver pieces become. Cover the entire surface of the roll with the slices. It is up to you if there are gaps between them or not.
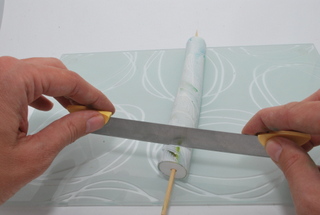
13.Roll out the roll to smooth out the slices.
14.Slice the roll proportionally. If you prefer tiny beads, the roll´s diameter should be about 1,5 cm and the length as well. If you fancy larger bead, make the diameter bigger.
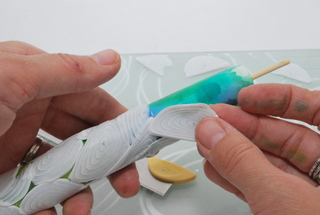
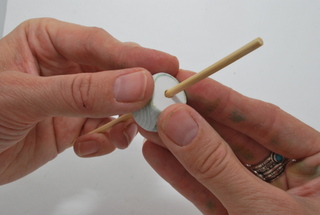
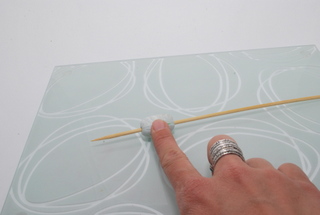
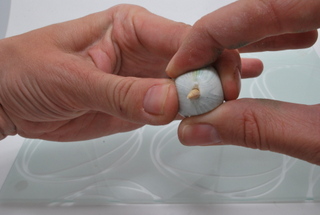
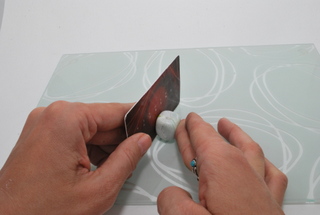
15.Now, shape the slices and make them beads. Keep on working on the skewer. First, shape the hole: hold the ends of the bead between your fingers, move the bead up and down by pressing the ends slightly inwards and lock the bead around the skewer (pict. 15a). Next, roll it out in your palms to reach ball shape. If the hole distorts, shape it again using the skewer. Roll out the bead on the mat with your fingers and it turns into a cylinder (pict. 15b). If you want to have a cube, put the bead off the skewer and shape it with your thumb and middle finger by pressing the opposite sides inwards (pict. 15c). Sharp-edged sides can be made by pressing the cube against a piece of glass or a credit card (pict. 15d).
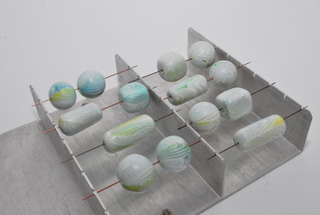
16.Bake the beads following instructions of the clay producer. Bake them either on a stand or zigzag placed on folded up paper to avoid pressing the beads.
17.String the beads on e.g. waxed cord and fasten them with knots. I chose metal chain of rings. The beads are attached by means of eyepins.
TIPS:
Put hot beads in icy water and transparent colour will turn more transparent.
Buff the beads by rubbing them against jeans or fleece.
If you want to attach the beads by means of eyepins, swap a skewer for a thin needle.
Enjoy your creation!
Petra Nemravka
(the instruction was published in Koralki)