Contacts
Our storage house and office
Nemravka.cz
(areál
K
251 62 Tehovec-Vojkov
How to find us
e-mail: info@nemravka.cz
+420 734 742 604
You can do a purchase or pick up your orders.
Opening hours:
Mo - Fr 8 - 14
General information
info@nemravka.cz
Information about your orders
objednavky@nemravka.cz
+420 734 742 604
Wholesale
velkoobchod@nemravka.cz
Information about polymer clay
petra@nemravka.cz
Information about scrapbooking
scrapbooking@nemravka.cz
- Home
- Useful Links and Tips
- About (Polymer) claying
- Polymer Clay Jewelry
- Soufflé channel bracelets
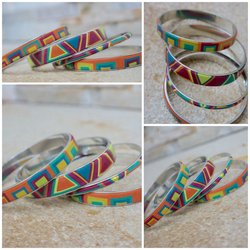
Soufflé channel bracelets
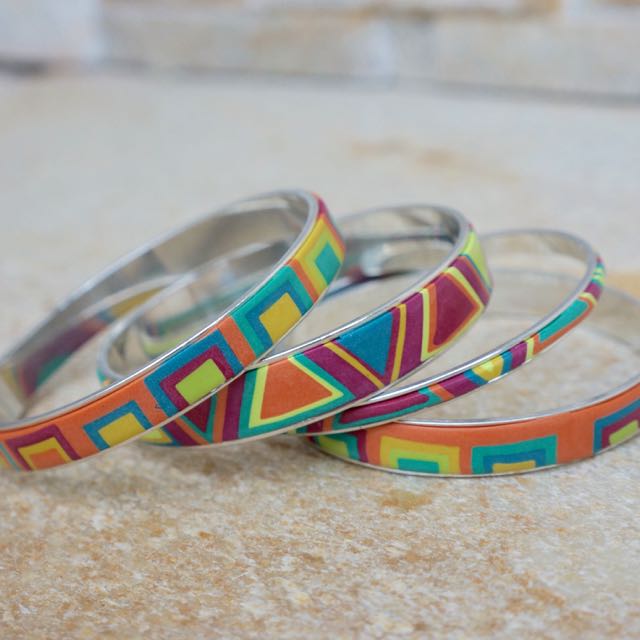
Channel bracelets is one of the topics I use to come back to in my practice. I have always been interested in the combination of Polymer Clay and metal. Metal embellished with colour is simply beautiful, moreover, Polymer Clay adds a new dimension to the metal – both the contrast and the harmony. For this project I use a technique I learnt time ago at a course of Lindly Haunani, mistress of colours. Thank you for letting me in on the technique, Lindly!
I use Scupley Soufflé, brand new clay from 2014. It is 20% lighter than common Polymer Clay. It is exceptional for its wonderful pastel colours, powder suede finish and smooth connection of two parts attached one to another. That is why it is called Soufflé…
Note: If you are not familiar with Soufflé, read this article.
Well, let´s get down to the actual project. We need following:
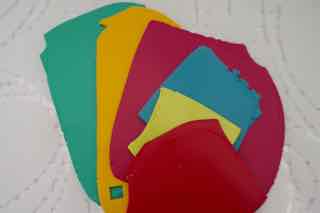
clay pieces of various colours and sizes – I use Soufflé clay for this project.
mini clay seamless cutters: squares and triangles, or use professional clay cutter set by Kemper.
tracing paper or another type of (office) paper.
spoon or another smoothing tool
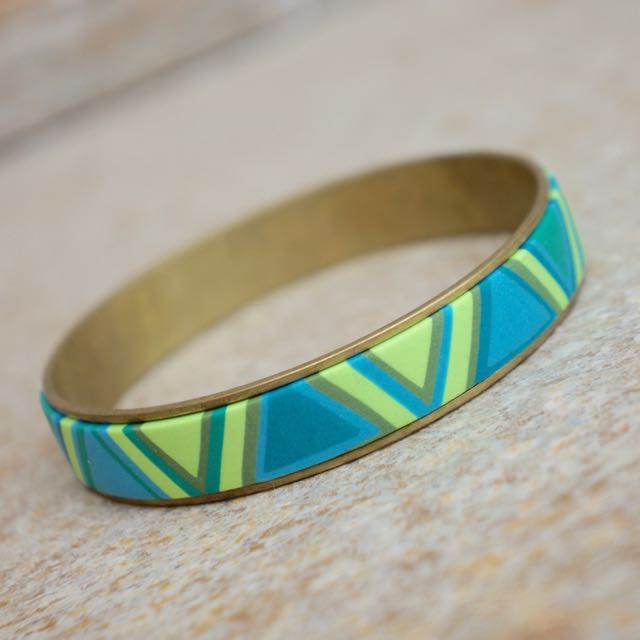
and, sure, channel bracelets, or more precisely channel bracelet blanks
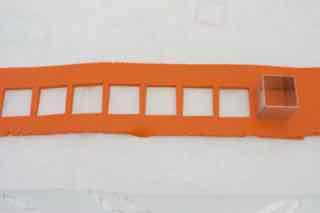
1. Blend clay scraps and make sheets. Roll out a sheet on a #3 setting of Imperia pasta machine, i.e. medium setting. If the sheet is too thick, it will be quite hard to work with it – the clay does not fit in the blank properly, it sticks out and smoothing it towards edges is almost impossible.
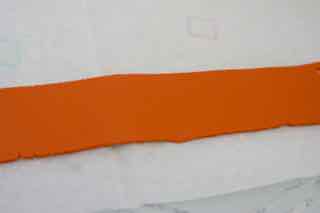
2. Now, choose a basic colour (I have an orange one) and make 3 cm thick (actually, thin☺) sheet. This is the basis of the bracelet, so do not forget to measure its length. I usually do it by winding a piece of paper I am working on around the channel bracelets to mark the appropriate length.
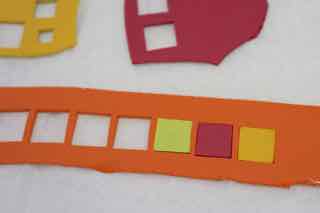
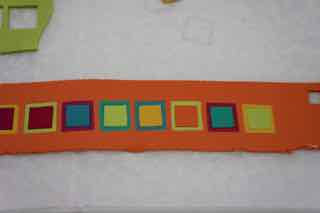
3. Place the clay on the paper. Throughout the entire length of the sheet cut out the largest squares you want to use (I use the third smallest size of the mini cutters). You can either cut out all the squares of the sheet and then fill the gaps with squares of other colours or just cut out one square of the sheet and fill the gap with another colour square, and so on… Choose various colours of the squares from the palette you have prepared. Thanks to the paper the clay remains in the cutter and is not stuck to the mat.
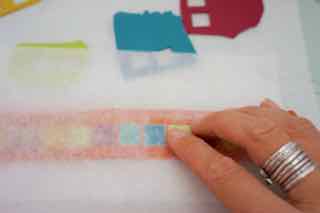
4. Fold the paper (or take another sheet and place it over) and smooth the clay throughout the entire length of the bracelet by using the spoon or you fingers (warm hands are perfect for Soufflé). As soon as the white links at joints disappear from the tracing (parchment) paper and the clay shows even through the paper, it is done.
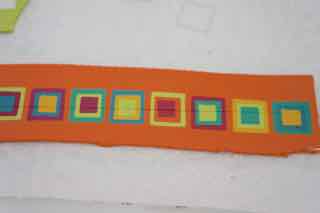
5. After smoothing the clay, unstick the sheet from the paper using a blade.Next, cut out squares with a cutter one size smaller than the one you used before and repeat the process. At the end, smooth the surface out and cut it off.
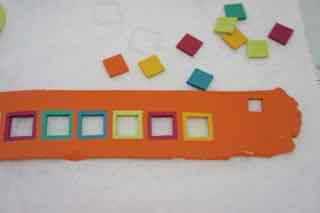
6. Now, take the smallest size of the cutter to fill in the centres of the squares. Do not forget to use all available colours. The smallest squares can be hardly removed from the cutter with fingers without being distorted, so use any round tool or just a clean fine brush to get them out. Smooth the sheet for the last time and cut it off.
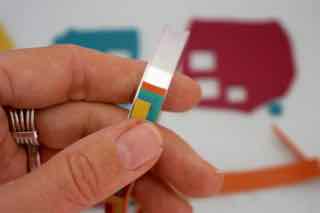
7. It is time to measure the size of the channels: cut an adequately wide strip of the sheet and put it into the channel. Measuring the length of the channel beforehand is useful as well as cutting the piece a bit larger than necessary. Wind the strip around the bracelet and cut it off at the spot where the ends overlap. Remove excessive clay, smooth the surface with your fingers over the paper to avoid blurring the motif, and it is done! You can see in the picture that I divided the squares into two parts and placed them into two bracelet blanks.
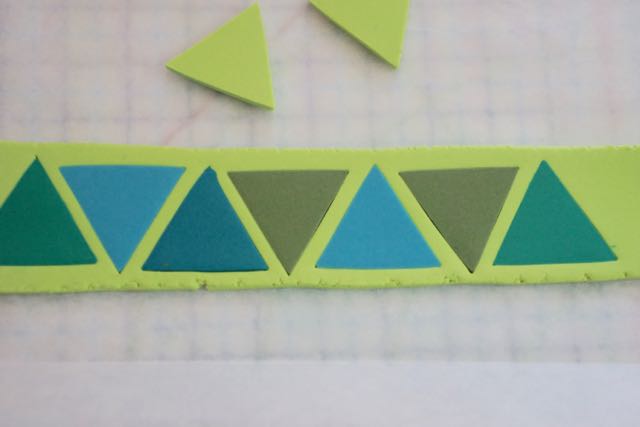
8. Repeat the same procedure with triangles arranging them into a zigzag pattern, e.g. one next to each other fitting one shape into another.
That´s it! 
Enjoy the creation! We appreciate if you send us a picture of your own bracelets.
Petra Nemravka